Running DIT4C
Overview
In Development
To run a minimal DIT4C environment for development, you need to run the following:
You may optionally run a:
- DIT4C image server (dit4c-imageserver-filesystem/dit4c-imageserver-swift)
- DIT4C routing server (dit4c-routingserver-ssh)
- DIT4C storage server (dit4c-fileserver-9pfs)
If you do not wish to save instances, you do not need to deploy an image server. By using a helper that utilizes ngrok, you do not need to run a routing server in development. However, you should avoid using ngrok for the traffic demands of a production service.
In Production
When running the portal in production, you will need a TLS certificate, as HTTPS is required for secure OAuth. A Let's Encrypt certificate will be perfectly satisfactory. A self-signed certificate will not, as almost every service of DIT4C accesses the portal and expects a valid certificate when using HTTPS.
You will also need to run a DIT4C routing server. To use the recommended routing server with (dit4c-routingserver-ssh) you will require a wildcard certificate. Using HTTPS is strongly advised, and you can use a self-signed certificate for test environments if necessary.
Apache Cassandra
In Development
A database is required for both the portal and scheduler. Ensure Cassandra is available somehow on localhost:9042. By default, no authentication is expected.
From tarball or Debian package: http://cassandra.apache.org/doc/latest/getting_started/installing.html
Docker image: https://hub.docker.com/r/_/cassandra/
In Production
You likely will want to run Cassandra with replication. While the portal is not currently capable of running as a cluster, this will allow relatively quick restart on a cold stand-by machine should that be necessary. If you wish to use etcd to coordinate that cluster, take a look at https://github.com/dit4c/container-cassandra-etcd.
Cassandra authentication can be configured as described in its manual. The DIT4C portal and scheduler use akka-persistence-cassandra, which provides authentication configuration.
Examples of Cassandra backup scripts can be found in https://github.com/dit4c/backup-scripts.
DIT4C portal
In Development
Running the portal
Running the portal in development requires that you have Git & SBT installed.
git clone https://github.com/dit4c/dit4c.git
cd dit4c
sbt ";project portal;~run -Dplay.crypto.secret=foobar"
Portal IP address
To send messages to the DIT4C portal, other services need a hostname or IP address. In production this will likely be DNS A record pointing to a public IPv4 address. In development, because not all DIT4C services run on the same network stack (eg. compute nodes), using "localhost" (127.0.0.1 or ::1) won't work. It's important to instead use an IP address that's reachable by all components. Most likely this will be the gateway address of the private network you're running the compute node VM on, but it could be another address.
For future examples, we'll use 192.168.100.1.
In Production
Running the portal container
Container builds of the portal are available for quick start and upgrading. They can be built from source using scripts/build_containers.sh.
This also makes it easy to reverse-proxy the DIT4C portal behind a HTTP2 reverse-proxy for improved performance and security.
To run the container using a nghttpx reverse-proxy:
/usr/bin/rkt run \
  --dns=8.8.8.8 \
  --hostname=dit4c-portal \
  --hosts-entry=127.0.0.1=dit4c-portal \
  --volume tls,kind=host,source=/etc/tls,readOnly=true \
  --volume=conf,kind=host,source=/etc/dit4c-portal,readOnly=true \
  https://github.com/dit4c/dit4c/releases/download/v0.10.2/dit4c-portal.linux.amd64.aci \
  --mount volume=conf,target=/conf \
  --port ssh:2222 \
  -- \
  -Dconfig.file=/conf/prod.conf \
  --- \
  https://github.com/dit4c/dockerfile-nghttpx/releases/download/1.1.1/nghttpx.linux.amd64.aci \
  --mount volume=conf,target=/data/conf \
  --mount volume=tls,target=/data/tls \
  --port 3000-tcp:443 \
  -- \
  --conf=/data/conf/nghttpx.conf \
  --backend=127.0.0.1,9000 \
  /data/tls/server.key /data/tls/server.crt
nghttpx.conf:
accesslog-file=/dev/stdout
errorlog-file=/dev/stderr

backend-read-timeout=86400
http2-no-cookie-crumbling=true
ciphers=ECDHE-RSA-AES128-GCM-SHA256:ECDHE-ECDSA-AES128-GCM-SHA256:ECDHE-RSA-AES256-GCM-SHA384:ECDHE-ECDSA-AES256-GCM-SHA384:DHE-RSA-AES128-GCM-SHA256:DHE-DSS-AES128-GCM-SHA256:kEDH+AESGCM:ECDHE-RSA-AES128-SHA256:ECDHE-ECDSA-AES128-SHA256:ECDHE-RSA-AES128-SHA:ECDHE-ECDSA-AES128-SHA:ECDHE-RSA-AES256-SHA384:ECDHE-ECDSA-AES256-SHA384:ECDHE-RSA-AES256-SHA:ECDHE-ECDSA-AES256-SHA:DHE-RSA-AES128-SHA256:DHE-RSA-AES128-SHA:DHE-DSS-AES128-SHA256:DHE-RSA-AES256-SHA256:DHE-DSS-AES256-SHA:DHE-RSA-AES256-SHA:AES128-GCM-SHA256:AES256-GCM-SHA384:AES128-SHA256:AES256-SHA256:AES128-SHA:AES256-SHA:AES:CAMELLIA:DES-CBC3-SHA:!aNULL:!eNULL:!EXPORT:!DES:!RC4:!MD5:!PSK:!aECDH:!EDH-DSS-DES-CBC3-SHA:!EDH-RSA-DES-CBC3-SHA:!KRB5-DES-CBC3-SHA
add-response-header=Strict-Transport-Security: max-age=15724800; includeSubDomains
add-forwarded=by,for,host,proto
forwarded-by=ip
forwarded-for=ip
Example nghttpx.conf:
# include the base config - very important!
include "application"
cassandra-settings {
authentication {
username="cassandra-user"
password="6TxnrbXIuWh5u1Q2LDVEpMmo4ASQjCET"
}
cluster-id = "dit4c-portal"
contact-points = ["10.99.1.20", "10.99.1.30", "10.99.1.40"]
replication-strategy = "NetworkTopologyStrategy"
data-center-replication-factors = ["melbourne-qh2-uom:1", "melbourne-np:1", "QRIScloud:1"]
used-hosts-per-remote-dc = 1
write-consistency = "QUORUM"
read-consistency = "QUORUM"
}
cassandra-journal = ${cassandra-settings}
cassandra-snapshot-store = ${cassandra-settings}
silhouette {
# GitHub API credentials
github.clientID=69be19206bcda8e7491c
github.clientSecret=32aaba716908b4ef73fb8bbd3096b156
# RapidAAF (Australian Access Federation) credentials
rapidaaf.url="https://rapid.aaf.edu.au/jwt/authnrequest/research/BMXaBBFAGMLFYlpxbOI9SY"
rapidaaf.secret=vLiGY1QkMCjmhSQ3ryWEjhzZSYInPqaN
}
images {
# DIT4C image server for saving images
server="https://images.dit4c.example"
# Public container images (converted using docker2aci)
public=null
public {
openrefine {
display = "OpenRefine"
image = "https://openstack-swift-server.example:8888/v1/AUTH_baaf1c56475deb8506abd9325fb69a07/dit4c-public-images/dit4c-dit4c-container-openrefine-latest.aci"
tags = ["OpenRefine"]
}
jupyter {
display = "Jupyter with Python & R"
image = "https://openstack-swift-server.example:8888/v1/AUTH_baaf1c56475deb8506abd9325fb69a07/dit4c-public-images/dit4c-dit4c-container-jupyter-latest.aci"
tags = ["Python", "R"]
}
}
}
# Google Analytics details
tracking.ga {
id="UA-54000000-1"
errors=false
}
# Symmetric secret for encrypting cookies and portal-issued tokens
play.crypto.secret=DIT4CextremelySecretSymmetricK3y
# Reverse-proxy client info forwarding
play.http.forwarded.version=rfc7239
# Allow SSH server to be accessed outside container
ssh.ip=0.0.0.0
# Login page customization
login {
# From https://www.flickr.com/photos/resbaz/24946337961/
background-image-url="https://farm2.staticflickr.com/1568/24946337961_4f91249161_k.jpg"
message.text=""
}
# Public config available via /config.json
public-config {
# Routing servers
router.ssh.servers = [
"bne.containers.dit4c.example:2222"
"mel.containers.dit4c.example:2222"
]
storage.9pfs.servers = [
"45.110.234.34:2222"
]
}
DIT4C scheduler
Scheduler keys
DIT4C schedulers use PGP keys for identification, configuration and SSH authentication to compute nodes. You will need to create a PGP primary key for each scheduler. We'll use gpg2.
Key Creation
First, we create a PGP primary key on a separate secure machine, solely for certification:
$ gpg2 --full-gen-key --expert
gpg (GnuPG) 2.1.13; Copyright (C) 2016 Free Software Foundation, Inc.
This is free software: you are free to change and redistribute it.
There is NO WARRANTY, to the extent permitted by law.

Please select what kind of key you want:
   (1) RSA and RSA (default)
   (2) DSA and Elgamal
   (3) DSA (sign only)
   (4) RSA (sign only)
   (7) DSA (set your own capabilities)
   (8) RSA (set your own capabilities)
   (9) ECC and ECC
  (10) ECC (sign only)
  (11) ECC (set your own capabilities)
Your selection? 8

Possible actions for a RSA key: Sign Certify Encrypt Authenticate
Current allowed actions: Sign Certify Encrypt

   (S) Toggle the sign capability
   (E) Toggle the encrypt capability
   (A) Toggle the authenticate capability
   (Q) Finished

Your selection? s

Possible actions for a RSA key: Sign Certify Encrypt Authenticate
Current allowed actions: Certify Encrypt

   (S) Toggle the sign capability
   (E) Toggle the encrypt capability
   (A) Toggle the authenticate capability
   (Q) Finished

Your selection? e

Possible actions for a RSA key: Sign Certify Encrypt Authenticate
Current allowed actions: Certify

   (S) Toggle the sign capability
   (E) Toggle the encrypt capability
   (A) Toggle the authenticate capability
   (Q) Finished

Your selection? q
RSA keys may be between 1024 and 4096 bits long.
What keysize do you want? (2048) 4096
Requested keysize is 4096 bits
Please specify how long the key should be valid.
         0 = key does not expire
      <n>  = key expires in n days
      <n>w = key expires in n weeks
      <n>m = key expires in n months
      <n>y = key expires in n years
Key is valid for? (0) 2y
Key expires at Sun 03 Mar 2019 12:45:01 AEST
Is this correct? (y/N) y

GnuPG needs to construct a user ID to identify your key.

Real name: DIT4C dev scheduler
Email address:
Comment: documentation example
You selected this USER-ID:
    "DIT4C dev scheduler (documentation example)"

Change (N)ame, (C)omment, (E)mail or (O)kay/(Q)uit? o
We need to generate a lot of random bytes. It is a good idea to perform
some other action (type on the keyboard, move the mouse, utilize the
disks) during the prime generation; this gives the random number
generator a better chance to gain enough entropy.
gpg: key 210512A677C41E86 marked as ultimately trusted
gpg: revocation certificate stored as '/home/uqtdettr/.gnupg/openpgp-revocs.d/34546BBDED7719C865C3C4E8210512A677C41E86.rev'
public and secret key created and signed.

gpg: checking the trustdb
gpg: marginals needed: 3  completes needed: 1  trust model: pgp
gpg: depth: 0  valid:   9  signed:   0  trust: 0-, 0q, 0n, 0m, 0f, 9u
gpg: next trustdb check due at 2018-01-20
pub   rsa4096 2017-03-03 [] [expires: 2019-03-03]
      34546BBDED7719C865C3C4E8210512A677C41E86
uid           [ultimate] DIT4C dev scheduler (documentation example)
We then add two sub-keys for signing and authentication, choosing not to set password protection when prompted:
$ gpg2 --expert --edit-key 34546BBDED7719C865C3C4E8210512A677C41E86
gpg (GnuPG) 2.1.13; Copyright (C) 2016 Free Software Foundation, Inc.
This is free software: you are free to change and redistribute it.
There is NO WARRANTY, to the extent permitted by law.

Secret key is available.

sec  rsa4096/210512A677C41E86
     created: 2017-03-03  expires: 2019-03-03  usage: C
     trust: ultimate      validity: ultimate
[ultimate] (1). DIT4C dev scheduler (documentation example)

gpg> addkey
Please select what kind of key you want:
   (3) DSA (sign only)
   (4) RSA (sign only)
   (5) Elgamal (encrypt only)
   (6) RSA (encrypt only)
   (7) DSA (set your own capabilities)
   (8) RSA (set your own capabilities)
  (10) ECC (sign only)
  (11) ECC (set your own capabilities)
  (12) ECC (encrypt only)
  (13) Existing key
Your selection? 8

Possible actions for a RSA key: Sign Encrypt Authenticate
Current allowed actions: Sign Encrypt

   (S) Toggle the sign capability
   (E) Toggle the encrypt capability
   (A) Toggle the authenticate capability
   (Q) Finished

Your selection? s

Possible actions for a RSA key: Sign Encrypt Authenticate
Current allowed actions: Encrypt

   (S) Toggle the sign capability
   (E) Toggle the encrypt capability
   (A) Toggle the authenticate capability
   (Q) Finished

Your selection? e

Possible actions for a RSA key: Sign Encrypt Authenticate
Current allowed actions:

   (S) Toggle the sign capability
   (E) Toggle the encrypt capability
   (A) Toggle the authenticate capability
   (Q) Finished

Your selection? a

Possible actions for a RSA key: Sign Encrypt Authenticate
Current allowed actions: Authenticate

   (S) Toggle the sign capability
   (E) Toggle the encrypt capability
   (A) Toggle the authenticate capability
   (Q) Finished

Your selection? q
RSA keys may be between 1024 and 4096 bits long.
What keysize do you want? (2048)
Requested keysize is 2048 bits
Please specify how long the key should be valid.
         0 = key does not expire
      <n>  = key expires in n days
      <n>w = key expires in n weeks
      <n>m = key expires in n months
      <n>y = key expires in n years
Key is valid for? (0)
Key does not expire at all
Is this correct? (y/N) y
Really create? (y/N) y
We need to generate a lot of random bytes. It is a good idea to perform
some other action (type on the keyboard, move the mouse, utilize the
disks) during the prime generation; this gives the random number
generator a better chance to gain enough entropy.

sec  rsa4096/210512A677C41E86
     created: 2017-03-03  expires: 2019-03-03  usage: C
     trust: ultimate      validity: ultimate
ssb  rsa2048/CD0BC076A71E68E5
     created: 2017-03-03  expires: never       usage: A
[ultimate] (1). DIT4C dev scheduler (documentation example)

gpg> addkey
Please select what kind of key you want:
   (3) DSA (sign only)
   (4) RSA (sign only)
   (5) Elgamal (encrypt only)
   (6) RSA (encrypt only)
   (7) DSA (set your own capabilities)
   (8) RSA (set your own capabilities)
  (10) ECC (sign only)
  (11) ECC (set your own capabilities)
  (12) ECC (encrypt only)
  (13) Existing key
Your selection? 4
RSA keys may be between 1024 and 4096 bits long.
What keysize do you want? (2048)
Requested keysize is 2048 bits
Please specify how long the key should be valid.
         0 = key does not expire
      <n>  = key expires in n days
      <n>w = key expires in n weeks
      <n>m = key expires in n months
      <n>y = key expires in n years
Key is valid for? (0)
Key does not expire at all
Is this correct? (y/N) y
Really create? (y/N) y
We need to generate a lot of random bytes. It is a good idea to perform
some other action (type on the keyboard, move the mouse, utilize the
disks) during the prime generation; this gives the random number
generator a better chance to gain enough entropy.

sec  rsa4096/210512A677C41E86
     created: 2017-03-03  expires: 2019-03-03  usage: C
     trust: ultimate      validity: ultimate
ssb  rsa2048/CD0BC076A71E68E5
     created: 2017-03-03  expires: never       usage: A
ssb  rsa2048/E33DA3F435A246F9
     created: 2017-03-03  expires: never       usage: S
[ultimate] (1). DIT4C dev scheduler (documentation example)

gpg> save
Once saved, get the full PGP key fingerprints using the primary key ID:
$ gpg2 --with-subkey-fingerprint --list-keys 210512A677C41E86
pub   rsa4096 2017-03-03 [C] [expires: 2019-03-03]
      34546BBDED7719C865C3C4E8210512A677C41E86
uid           [ unknown] DIT4C dev scheduler (documentation example)
sub   rsa2048 2017-03-03 [A]
      6A6C97128AD8EAD1769E9B6DCD0BC076A71E68E5
sub   rsa2048 2017-03-03 [S]
      BE3950379932FF45106DF313E33DA3F435A246F9
Future examples will use the key IDs above.
Key usage explanation
We now have a primary key and two sub-keys. While in development, key security isn't as important, however it's worthwhile thinking about how key security will operate in production.
The primary key should be stored securely, preferably offline when not in use for key rotation or renewal. It's entirely possible it will only be used (every two years in this case) to update the PGP key expiry date.
The authentication sub-key is used by the scheduler to identify itself to the portal, and is also transformed into the SSH key that is used to log into compute nodes. Both the public and secret key will need to be exported for use on the scheduler.
The signing sub-key is only used for sending messages to the scheduler. Only the public component needs to be on the scheduler. The secret key should be stored securely, and may be transferred to a smart card or other hardware device if desired.
Key export
Export just the authentication secret sub-key:
$ gpg2 --armor \
  --export-secret-subkeys 6A6C97128AD8EAD1769E9B6DCD0BC076A71E68E5! \
  > dev_scheduler_secret_keyring.asc
Then export all the public keys:
$ gpg2 --armor \
  --export 34546BBDED7719C865C3C4E8210512A677C41E86 \
  > dev_scheduler_public_keyring.asc
Create scheduler in portal
When running in development, open <ip-address>:9000 to ensure the portal app is fully loaded.
SSH to port 2222, with username dit4c and password as the value of ssh.password, or if not set, play.crypto.secret. In the example above, this is foobar.
Once you have a Scala REPL running inside the portal environment, send a message to create a new scheduler:
$ ssh -p 2222 dit4c@localhost
Warning: Permanently added '[localhost]:2222' (RSA) to the list of known hosts.
Password authentication
Password:
Compiling replBridge.sc
Compiling interpBridge.sc
Compiling HardcodedPredef.sc
Compiling ArgsPredef.sc
Compiling predef.sc
Compiling SharedPredef.sc
Compiling LoadedPredef.sc
Welcome to the Ammonite Repl 0.8.1
(Scala 2.11.8 Java 1.8.0_121)
@ import domain._
import domain._
@ import services._
import services._
@ app.actorSystem.eventStream.publish(
  SchedulerSharder.Envelope("34546BBDED7719C865C3C4E8210512A677C41E86",
  SchedulerAggregate.Create))

@ exit
When the scheduler connects & sends its PGP public keys, the portal will match them to the provided fingerprint.
Running the scheduler during development
To run the scheduler with a single cluster called "default":
$ sbt ";project scheduler;run
  --keys $(pwd)/dev_scheduler_secret_keyring.asc
  --keys $(pwd)/dev_scheduler_public_keyring.asc
  --portal-uri http://192.168.100.1:9000/messaging/scheduler"
If multiple clusters are necessary, a config file can be supplied.
$ sbt ";project scheduler;run
  --keys $(pwd)/dev_scheduler_secret_keyring.asc
  --keys $(pwd)/dev_scheduler_public_keyring.asc
  --portal-uri http://192.168.100.1:9000/messaging/scheduler"
  --config $(pwd)/scheduler.conf
scheduler.conf:
clusters = null
clusters {
  instructors {
    displayName = "Instructor Sandbox"
  }
  training {
    displayName = "Training"
    supportsSave = false
  }
}
Running the scheduler in production
Like the portal, the scheduler is packaged in a container. It may be combined with Apache Cassandra into a single pod to provide a self-contained service.
rkt run \
  --dns=8.8.8.8 \
  --hostname=dit4c-scheduler \
  --hosts-entry=127.0.0.1=dit4c-scheduler \
  --volume cassandra-data,kind=host,source=/var/lib/cassandra \
  --volume=scheduler-conf,kind=host,source=/etc/dit4c-scheduler,readOnly=true \
  https://github.com/dit4c/dit4c/releases/download/v0.10.2/dit4c-scheduler.linux.amd64.aci \
  --mount volume=scheduler-conf,target=/conf \
  -- \
  --keys /conf/scheduler_keys.asc \
  --listener-image https://openstack-swift.example:8888/v1/AUTH_faa5bca1140a4824bfc96215c92498dd/dit4c-public-images/dit4c-helper-listener-ssh.linux.amd64.aci \
  --auth-image https://openstack-swift.example:8888/v1/AUTH_faa5bca1140a4824bfc96215c92498dd/dit4c-public-images/dit4c-helper-auth-portal.linux.amd64.aci \
  --portal-uri https://dit4c.example/messaging/scheduler \
  --config /conf/scheduler.conf \
  --- \
  https://github.com/dit4c/container-cassandra-etcd/releases/download/0.1.0/cassandra-etcd.linux.amd64.aci \
  --mount volume=cassandra-data,target=/var/lib/cassandra
Create cluster access pass
To use a scheduler's clusters, you will need a cluster access pass. It is a signed message in URL form, enumerating which clusters the holder of the token has access to, and for how long (denoted by the signature validity period).
$ ./scripts/create_cluster_access_token.sh
Using libprotoc 3.1.0
Cluster ID (enter to finish): default
Cluster ID (enter to finish):

Description (leave empty for none): Documentation example

###################
Cluster Access Pass
TEXT:
clusterIds: "default"
description: "Documentation example"
BINARY:
00000000  0a 07 64 65 66 61 75 6c  74 12 15 44 6f 63 75 6d  |..default..Docum|
00000010  65 6e 74 61 74 69 6f 6e  20 65 78 61 6d 70 6c 65  |entation example|
00000020
###################
GPG key to sign with (enter to finish): 34546BBDED7719C865C3C4E8210512A677C41E86
GPG key to sign with (enter to finish):
Please specify how long the signature should be valid.
         0 = signature does not expire
      <n>  = signature expires in n days
      <n>w = signature expires in n weeks
      <n>m = signature expires in n months
      <n>y = signature expires in n years
Signature is valid for? (0) 1m
Signature expires at Wed 05 Apr 2017 16:40:57 AEST
Is this correct? (y/N) y
###################
Signed Cluster Access Pass
Using:
34546BBDED7719C865C3C4E8210512A677C41E86
Armored:
-----BEGIN PGP MESSAGE-----
Version: GnuPG v2

owEBXAGj/pANAwAKAeM9o/Q1okb5AcsmYgBYvQR7CgdkZWZhdWx0EhVEb2N1bWVu
dGF0aW9uIGV4YW1wbGWJASIEAAEKAAwFAli9BHsFgwAnjQAACgkQ4z2j9DWiRvkK
Lgf/bYkDQr6owkf8NFocJ+4fguDuCNTAw1hVsrVnGupXjGjZn2QvYFvrMe9iK/QR
TGwzcnljglv/JN8J5kookaueVOI8uNN9g2BgYpjm+LEzNYtGzfs2FvGUHORHPDKt
bvGJkqnXaOu8G8PXH3dsEICVcCV37rEVAbhPb4UoyiSVecHolU/TtOMUa/T4Vie2
ABgP4TnPvahj9eS4nhfXNWNh5MigPSP5x2d1WAeFAUoaxSY5sbY0hlML0lWEfapG
tQA8W4p+ja5D8Mi1wmapDa3DNQgeIcJoTCn1LiYlWTGn/W6FkemTCztvELU15xnf
HS3q1F42Gekvz+uEW66y/xHSlw==
=R3+y
-----END PGP MESSAGE-----
URL-encoded:
owEBXAGj_pANAwAKAeM9o_Q1okb5AcsmYgBYvQR7CgdkZWZhdWx0EhVEb2N1bWVudGF0aW9uIGV4YW1wbGWJASIEAAEKAAwFAli9BHsFgwAnjQAACgkQ4z2j9DWiRvkKLgf_bYkDQr6owkf8NFocJ-4fguDuCNTAw1hVsrVnGupXjGjZn2QvYFvrMe9iK_QRTGwzcnljglv_JN8J5kookaueVOI8uNN9g2BgYpjm-LEzNYtGzfs2FvGUHORHPDKtbvGJkqnXaOu8G8PXH3dsEICVcCV37rEVAbhPb4UoyiSVecHolU_TtOMUa_T4Vie2ABgP4TnPvahj9eS4nhfXNWNh5MigPSP5x2d1WAeFAUoaxSY5sbY0hlML0lWEfapGtQA8W4p-ja5D8Mi1wmapDa3DNQgeIcJoTCn1LiYlWTGn_W6FkemTCztvELU15xnfHS3q1F42Gekvz-uEW66y_xHSlw
You can then use the URL-encoded payload in a link of the form:
<dit4c-portal>/share/clusters/<scheduler_id>/<payload>
In this example, that would be:
http://192.168.100.1:9000/share/clusters/34546BBDED7719C865C3C4E8210512A677C41E86/owEBXAGj_pANAwAKAeM9o_Q1okb5AcsmYgBYvQR7CgdkZWZhdWx0EhVEb2N1bWVudGF0aW9uIGV4YW1wbGWJASIEAAEKAAwFAli9BHsFgwAnjQAACgkQ4z2j9DWiRvkKLgf_bYkDQr6owkf8NFocJ-4fguDuCNTAw1hVsrVnGupXjGjZn2QvYFvrMe9iK_QRTGwzcnljglv_JN8J5kookaueVOI8uNN9g2BgYpjm-LEzNYtGzfs2FvGUHORHPDKtbvGJkqnXaOu8G8PXH3dsEICVcCV37rEVAbhPb4UoyiSVecHolU_TtOMUa_T4Vie2ABgP4TnPvahj9eS4nhfXNWNh5MigPSP5x2d1WAeFAUoaxSY5sbY0hlML0lWEfapGtQA8W4p-ja5D8Mi1wmapDa3DNQgeIcJoTCn1LiYlWTGn_W6FkemTCztvELU15xnfHS3q1F42Gekvz-uEW66y_xHSlw
You may wish to use a URL shortener for easier distribution, though consider the security implications before doing so.
CoreOS VM compute node
In theory, you could use any VM that has systemd and rkt. In practice, it's simpler to use CoreOS. In production, you're likely to use cloud-config or Ignition to configure the reboot strategy, add SSH keys and mount storage, however the default config will work fine for development.
Starting
There are many ways to run a CoreOS VM on your desktop. One way that works quite well for DIT4C development is using QEMU: https://coreos.com/os/docs/latest/booting-with-qemu.html
Start the VM with a different port, as 2222/tcp is used by the DIT4C portal:
./coreos_production_qemu.sh -p 2223 -nographic
Installing SSH keys
You will need to deploy the SSH keys of the scheduler to the compute node. Fortunately, the DIT4C portal exposes that information via the portal.
$ ssh -p 2223 core@localhost
Warning: Permanently added '[localhost]:2223' (ECDSA) to the list of known hosts.
Last login: Mon Mar  6 05:09:39 UTC 2017 from 10.0.2.2 on pts/0
CoreOS alpha (1185.0.0)
core@coreos_production_qemu-1185-0-0 ~ $ export PS1="vm \$ "
vm $ curl -sL http://192.168.100.1:9000/schedulers/34546BBDED7719C865C3C4E8210512A677C41E86/ssh-keys > /tmp/keys
vm $ cat /tmp/keys
ssh-rsa AAAAB3NzaC1yc2EAAAADAQABAAABAQDGst1Yze4M3mMYGkq8l+oubbbeh9zX2Iu/QBKMNAHCUM80XK0FDQuqv0g6syTiln+hXi7RcmZogygm0n71l87iLiCchKZn+BwLJbF8TowPn5D7UcscRyGQ89trqfZdvCTz+y9zObPooS0HmhHj3jTNJ1aWpeFdhkPx7CYEa2e/1/M+Q9TtV06ilCHQwWwCBND/lF0QpKPothwT8dHbvMjtt04xV70NVf7qaWGtGirTq77NciQT3vNeRDDryXaGOUtCXlOdKu/NrAUoRlgE7nwgP1lWWm04puJqeGmmwqr7BRn8j/pvmEJQ8en964hlU8Dra0o0Tj6EVgNU9QbIeZmn
vm $ update-ssh-keys -A scheduler < /tmp/keys
Adding/updating scheduler:
2048 SHA256:166+GTUeSN6zcOLrsHtBSfF0SCTC1EYLKuHOzcBXZ1g no comment (RSA)
Updated /home/core/.ssh/authorized_keys
vm $ ssh-keyscan 127.0.0.1 2>/dev/null | grep -i RSA | awk '{print $2 " " $3 }' | ssh-keygen -l -f -
2048 SHA256:8QVNTTUeP2nN09/58Wevbbb47+foh/3YcKhJ/uM7T8o no comment (RSA)
vm $ exit
Register compute node with scheduler
The scheduler does not have a web interface of its own. Instead, when connected to the portal it can receive messages signed by its own keys. As a result, in production the host running the scheduler does not need to allow any incoming traffic, only outgoing.
A message is necessary to create a new compute node:
$ ./scripts/add_compute_node.sh
######################################################################## 100.0%
Using libprotoc 3.1.0
Cluster ID: default
Host: localhost
Port: 2223
Username: core
SSH Fingerprint (enter to finish): SHA256:8QVNTTUeP2nN09/58Wevbbb47+foh/3YcKhJ/uM7T8o
SSH Fingerprint (enter to finish):

###################
Add node request
TEXT:
addNode: {
clusterId: "default"
host: "localhost"
port: 2223
username: "core"
sshHostKeyFingerprints: "SHA256:8QVNTTUeP2nN09/58Wevbbb47+foh/3YcKhJ/uM7T8o"
}
BINARY:
00000000  0a 51 0a 07 64 65 66 61  75 6c 74 12 09 6c 6f 63  |.Q..default..loc|
00000010  61 6c 68 6f 73 74 18 af  11 22 04 63 6f 72 65 2a  |alhost...".core*|
00000020  32 53 48 41 32 35 36 3a  38 51 56 4e 54 54 55 65  |2SHA256:8QVNTTUe|
00000030  50 32 6e 4e 30 39 2f 35  38 57 65 76 62 62 62 34  |P2nN09/58Wevbbb4|
00000040  37 2b 66 6f 68 2f 33 59  63 4b 68 4a 2f 75 4d 37  |7+foh/3YcKhJ/uM7|
00000050  54 38 6f                                          |T8o|
00000053
###################
GPG key to sign with (enter to finish): 34546BBDED7719C865C3C4E8210512A677C41E86
GPG key to sign with (enter to finish):
Please specify how long the signature should be valid.
         0 = signature does not expire
      <n>  = signature expires in n days
      <n>w = signature expires in n weeks
      <n>m = signature expires in n months
      <n>y = signature expires in n years
Signature is valid for? (0) 1
Signature expires at Tue 07 Mar 2017 15:48:44 AEST
Is this correct? (y/N) y
###################
Signed add node request
Using:
34546BBDED7719C865C3C4E8210512A677C41E86
Armored:
-----BEGIN PGP MESSAGE-----
Version: GnuPG v2

owEBjwFw/pANAwAKAeM9o/Q1okb5ActZYgBYvPg9ClEKB2RlZmF1bHQSCWxvY2Fs
aG9zdBivESIEY29yZSoyU0hBMjU2OjhRVk5UVFVlUDJuTjA5LzU4V2V2YmJiNDcr
Zm9oLzNZY0toSi91TTdUOG+JASIEAAEKAAwFAli8+D0FgwABUYAACgkQ4z2j9DWi
RvnjQwgAzFqqFy0mqUqBfY0MHKO1g1AqltlFzCvx4fdLmelu+8M0bs/n6Co4Es4S
m3zPPurnoqZj024jeoF5KAJuYd+NpX4YGuSEUoFo3FYkdhJgwGqoJwQtEP0XZWOw
Pbo7AWkMHFTsLSz78MwMtaUA27o5EWb+kWssuRn7hZQO13fO5Xz2KTB3LiXs+hjT
3/OKFF+4ga2yYyUfgwnwNO3dAs0bp40S+PcPZ0VLMxn0fjEJI9oW5AhE99QtI5rZ
u8XSiPNB1Ot8vdi6G85gNd1HX5kU+1CSY+glu98e5b2DQIRd62Cp/GvezeQOi3LX
xhgqWD3f5d3+MtwYPp39hfrSsHF2Dw==
=7CMK
-----END PGP MESSAGE-----
Copy everything after Armored: and go to: http://192.168.100.1:9000/messaging/scheduler/34546BBDED7719C865C3C4E8210512A677C41E86/send
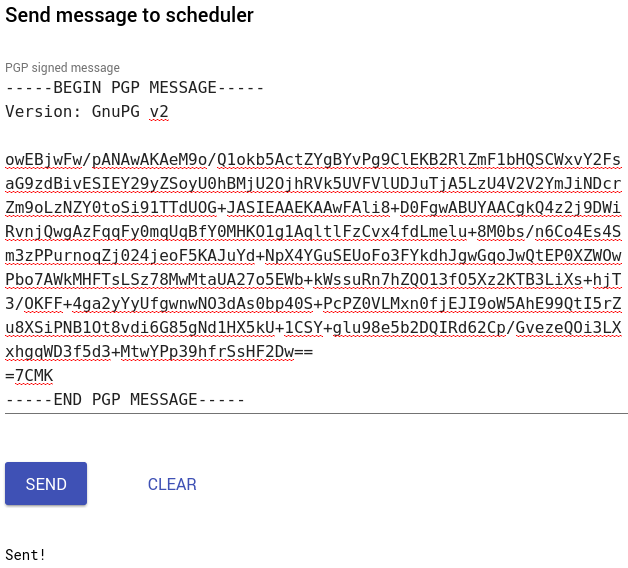
You should see message in the scheduler logs, reporting that the compute node has been created:
[info] 16:01:34.981 INFO dit4c.scheduler.domain.RktNode - Node RktClusterManager-default-RktNode-core_localhost_2223_SHA256%3A8QVNTTUeP2nN09%2F58Wevbbb47%2Bfoh%2F3YcKhJ%2FuM7T8o: JustCreated → Active
DIT4C image server
See dit4c-imageserver-filesystem or dit4c-imageserver-swift for details on running an image server.
You should ensure image.server is set, either with:
- the run option
-Dimage.server="https://images.dit4c.example", or - in
prod.conf.
When running in a development environment, keep in mind that the portal and all compute nodes must be able to contact the image server directly.
DIT4C routing server
See dit4c-routingserver-ssh for details on running a routing server.
The matching pod helper, dit4c-helper-listener-ssh, requires configuration to be supplied via /config.json from the portal. This can be supplied as in the portal configuration:
public-config {
  # Routing servers
  router.ssh.servers = [
    "bne.containers.dit4c.example:2222"
    "mel.containers.dit4c.example:2222"
  ]
To use the routing servers, specify a routing helper for schedulers using the --listener-image scheduler flag.
When running in a development environment, keep in mind that all compute nodes must be able to contact the routing server directly.
DIT4C storage server
Security implications
Mounting file storage requires the scheduler to disable at runtime some security features of rkt (--insecure-options=seccomp,paths). It is highly recommended that you use a specially-compiled version of rkt that uses the KVM/QEMU stage 1 by default, so each container is run in its own hypervisor.
ie.
git clone https://github.com/coreos/rkt.git
cd rkt
./autogen.sh
./configure \
  --with-stage1-flavors=kvm
  --with-stage1-default-flavor=kvm
  --with-stage1-kvm-hypervisors=qemu
make
Running
The only shared file storage server, dit4c-fileserver-9pfs, has quite poor IO performance due to the way the 9P filesystem is affected by latency. It was implemented primarily as a proof-of-concept, as it's simpler than an implementation based on NTP, CIFS or SFTP.
See dit4c-fileserver-9pfs for details on running a storage server.
The matching pod helper, dit4c-helper-storage-9pfs, requires configuration to be supplied via /config.json from the portal. This can be supplied as in the portal configuration:
public-config {
  # Storage servers
  storage.9pfs.servers = [
    "45.110.234.34:2222"
  ]
}
To use the storage servers, specify a storage helper for schedulers using the --storage-image scheduler flag. Some security features of rkt are disabled in order to mount storage.
When running in a development environment, keep in mind that all compute nodes must be able to contact the storage server directly.